In this blog post I will show the process of modelling and building the assets and scenes used for my immersive experience. As well as talking through the process of modelling some of the more difficult assets I will also talk about the things that went well, the struggles I came across and recap on some of the compositional and design choices I made.
When first modelling scene 1 I started with a plane as the floor which I then used the soft select tool to pull some vertices up to create an uneven floor shape. I feel that this really helped the environment feel more natural and also perhaps more familiar. After I had created the plane I then started to model the assets. I focused on modelling the assets that would be the focus point of the scene first then added the rest of the smaller models around it to frame the scene. The focus point for this particular scene is the three large mushrooms you see in the centre. These mushrooms were quite a simple shape so they were easy enough to model and when I was happy with them I added some smaller mushrooms and some flowers and grass to accentuate and frame the focal point. As you can see with the progress of the screenshots the shape of the scene really starts to come together. You can see in the composition that I purposefully chose assets to get smaller the further they are from the focal point but I also feel like they still are aesthetically pleasing and help the scene to feel complete. Most of the assets including the large mushrooms, are modelled by creating ‘Polygon Primitives’ such as cylinders and squares and then manipulating the vertices, edges and faces to create certain shapes. Most of the assets within scene one were fairly basic but I feel that the lighting, colours and the way its displayed make it a really effective environment. The final touch was adding the lighting, this was slightly trickier as I had to first model small sparkles using similar techniques but then using Arnold to turn it into a ‘Mesh light’. I was really happy with how this turned out and when I was happy with how the ‘IPR’ render was looking, I animated the sparkles to move up and down around the focal point, again to keep the users attention.
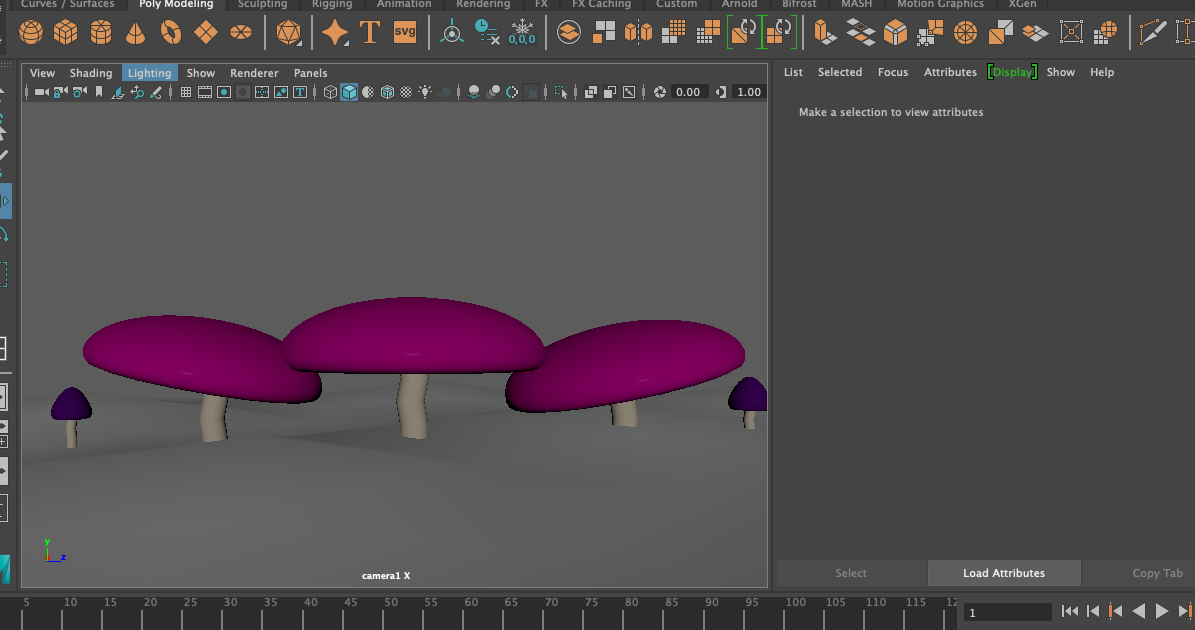
Figure 1 – In this screenshot you see the start of the focus point start to come together, you can also see the slight bumpiness of the plane underneath creating a natural forest floor feel.
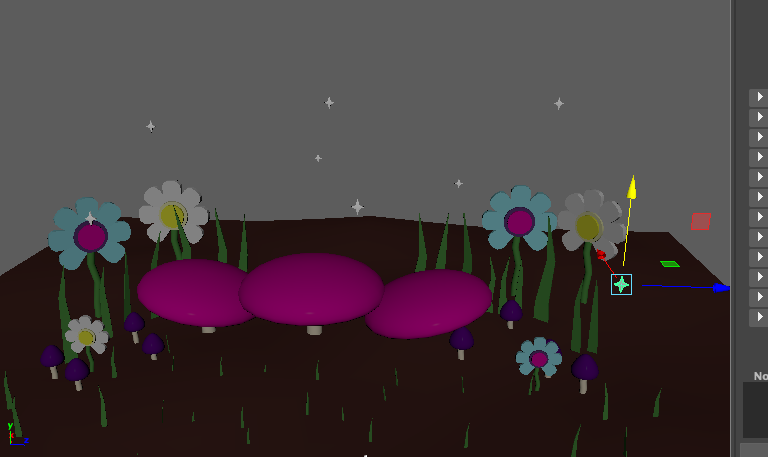
Figure 2 – This screenshot shows the lights starting to come together above the focus point but also illustrates how the assets angled into the focus point help draw the users attention inwards.
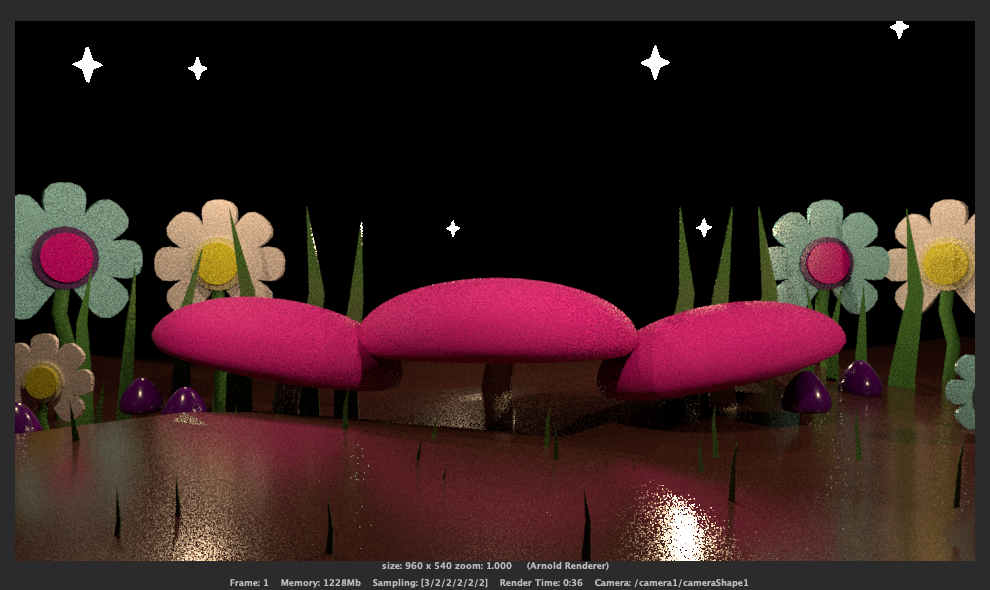
Figure 3 – This screenshot shows the final IPR render and the one that I was the most happy with. I did end up adjusting the roughness of the floor but overall I feel like this accurately shows the models and the scene well.
Scene two has my most complex models and animations. I started again by creating a plane as a floor and again I did soft select some vertices but eventually had to readjust these as they caused a couple of problems that I will discuss later.
After the floor had been made and I was happy with it, I started with the hedges. I wanted them to frame the scene perfectly and so decided that instead of using just a simple sphere or square, I would use a pipe to create the perfect round framing effect. I sized this up to the correct height and width and then modelled hearts separately again utilising the ‘Polygon Primitives’ and manipulating vertices to create the perfect heart shape. When I had the correct heart shape (which took a bit of tweaking and practise with the ‘Bevel’ tool) I placed them so they were overlapping into the pipe walls and used ‘Mesh – Difference’ to almost stamp the heart shapes out of the sides. Once I had this complex shape, I did my usual texturing method of using ‘AIStandardSurface’ and coloured it to a green tone. This was probably one of the more complex models I created in this whole immersive experience but overall I am extremely pleased with the outcome. As well as the hedges, I also made a simple castle in the background which is mostly a combination of cylinders, squares and extruding faces. The rest of the assets such as the trees and grass were just made to add some life to the gardens but by far the most intense part of this scene was creating the croquet animation. The biggest issue I ran into was the plane I created at the start for the ground was not level enough for the sphere animation to roll at the correct height for long. Because of this it took some alterations and a few goes to make sure that everything lined up properly and that the sphere did really go under the croquet hoops and was never magically floating above the ground. When this animation was done and finalised the last step was to add in a ‘Skydome light’ which worked really well in creating a sky-like effect.
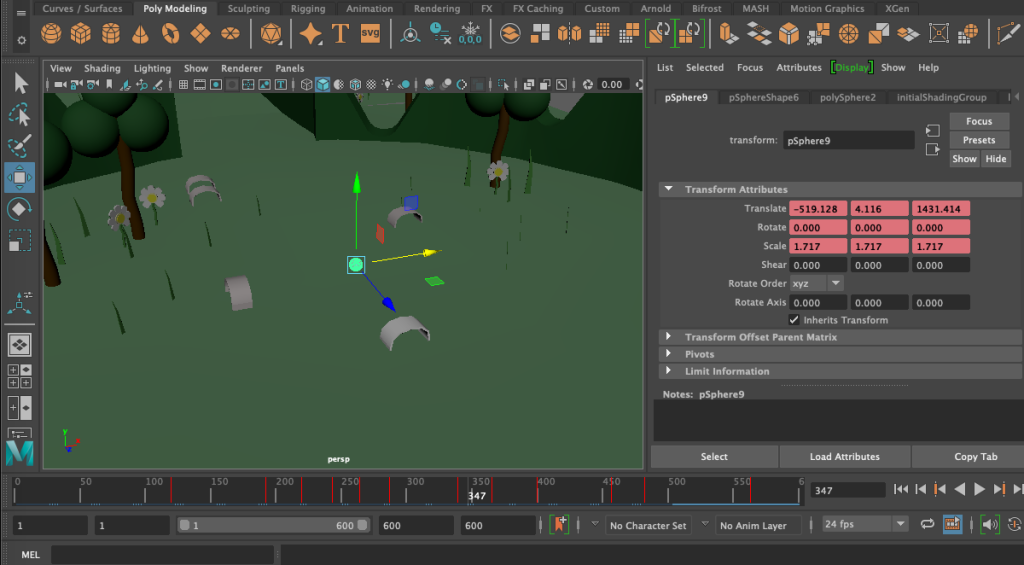
Figure 4 – This screenshot shows me animating the croquet ball going through the hoops, I used keyframes to try and move the sphere as naturally as I could.

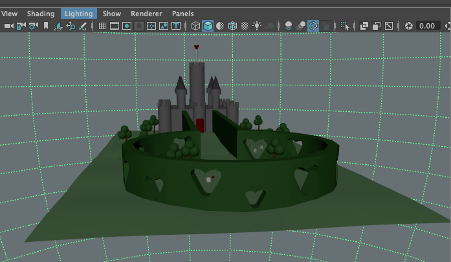
Figure 5+6 – Both screenshots above show the ‘Skydome’ light in action as well as some of the more complex models such as the hedge fencing and the castle in the background.
For the third and final scene (the chess match) the modelling process was quite simple. The hardest part of creating this scene was adjusting the overhead area light to accurately light the scene whilst also creating a hue over the entire board. But again, I started off with a plane which I then edited down to 8×8 faces as this is the correct chess board size. Once I had done that I assigned a new material straight away so that the board was in black and white. This helped me with placing the chess pieces when they had all been modelled. The modelling process for the chess pieces was actually quite fun, I imported a found image of some chess pieces onto an image plane then used the side view to measure up cylinders to the base of the chess pieces on the image. Once I had done this, I changed the ‘Subdivision count’ of the cylinder to 0 then extruded the faces and resized them accordingly to the shape on the image plane placed behind it as reference. This took quite a lot of experimenting and I ended up having difficulties with Maya completely crashing midway through modelling. The knight was easily the most difficult shape to model as it had more of a natural curve that I had to experiment with to create. However once all the chess pieces were made, it was a case of animating them correctly to mimic a chess match and then add the eerie lighting. For the lighting in this scene I did experiment with a ‘Skydome’ light but eventually decided that it made everything too cloudy and purple. I instead went with an overhead area light in purple and it took a few tweaks with the intensity and exposure in order to get the correct atmosphere. Eventually the IPR render got to a place I was happy with and I was able to send it out for rendering. Overall this scene ended up probably being the simplest scene but I am still really happy with the feeling of it and the effect it has. It’s definitely the most atmospheric.
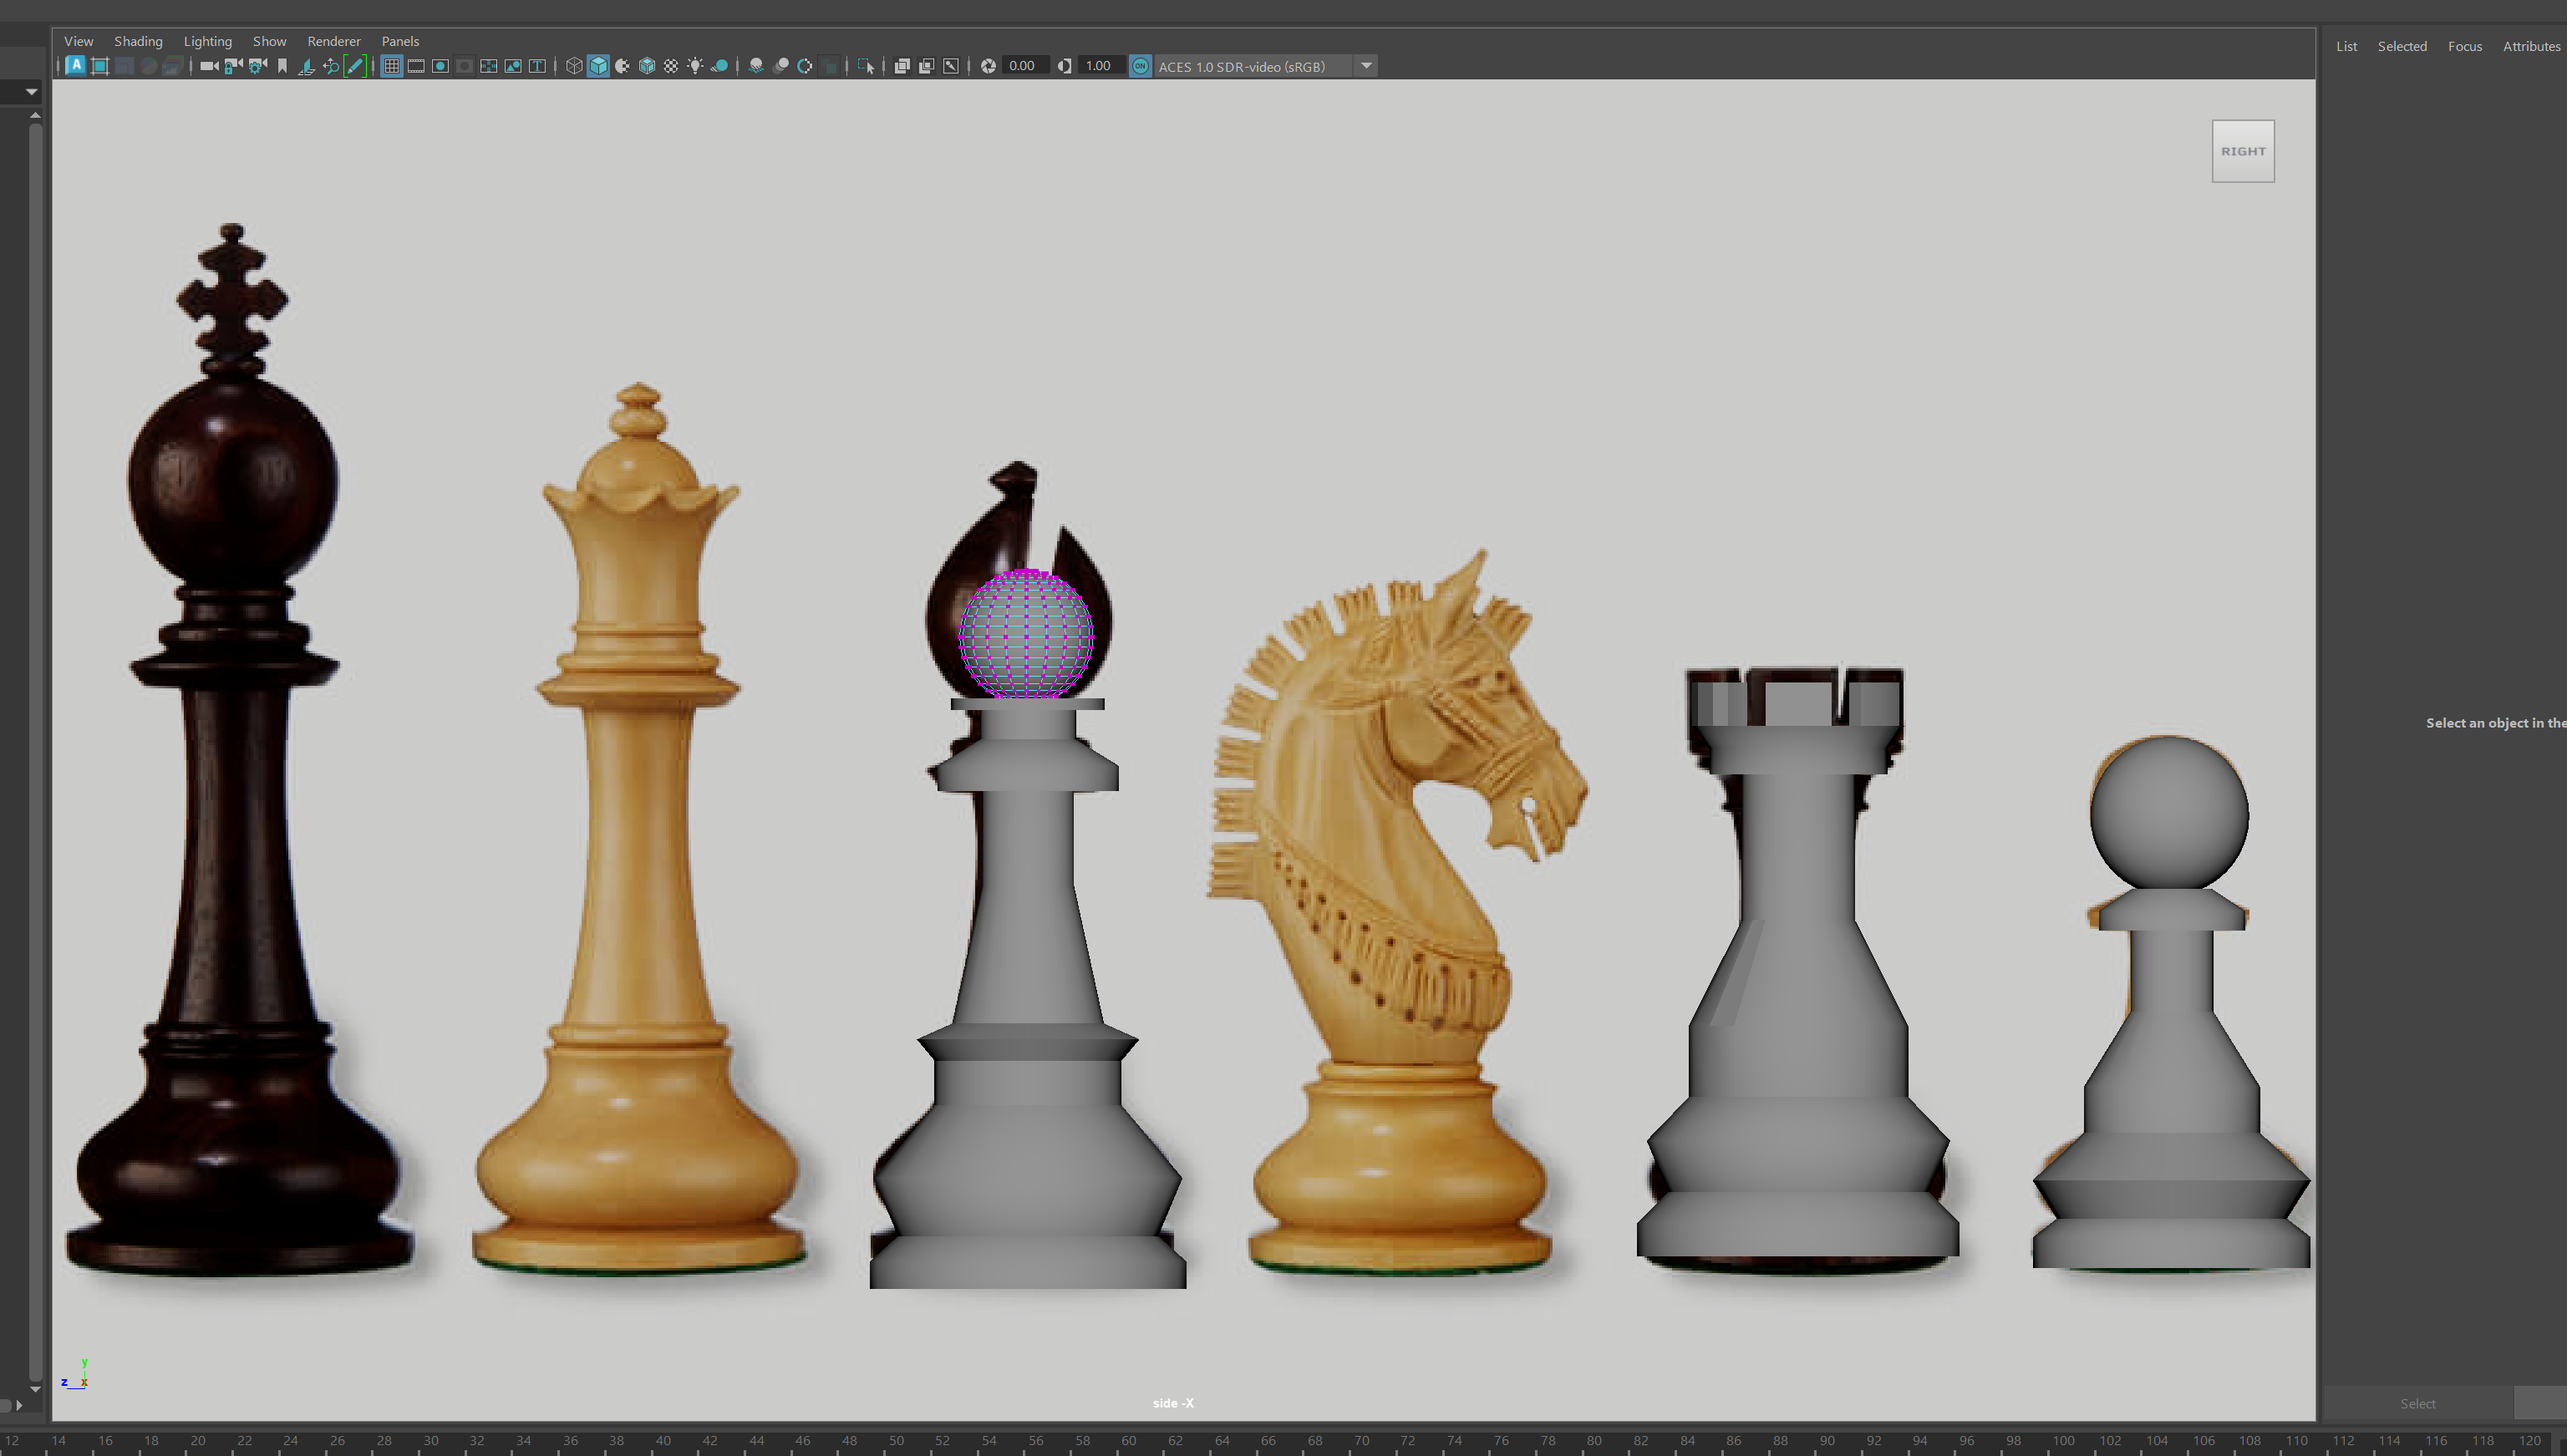
Figure 7- This screenshot shows me using the side view to model chess pieces. It really helped having the image plane as a reference behind the models as I just followed the shapes.
In terms of rendering all of the scenes it was a rather simple process that was all done through the viper farm on campus. I made sure that all cameras were set up as VR cameras set to ‘Over-under’ and were optimised for a 360 view. I also had to ensure that all the animations I had made were the correct time and length for the duration of the video. When the renders had been sent back to me I put them all together in premiere pro with audio.
References
Ubergames (?) Uber Armoured Staunton Rosewood Chess Pieces & Box – 6″ King. Available online: https://www.ubergames.co.uk/product/uber-armoured-staunton-rosewood-chess-set-box-6-king/ [Accessed 07/05/2023]