This is a basic overview of the process I took to create my 3D model. I will go through each step and how I got there.
To start off with, we built the basic anatomy of our character using the ‘IMM Primitives’ tool in a lab session. We were basically creating new shapes and putting them top of each other in order to create a basic anatomy shape. We would edit and use the ‘move’ brush to adjust each shape by using the ‘move’ mode and ‘Ctrl+clicking’ the shape that we wanted to edit
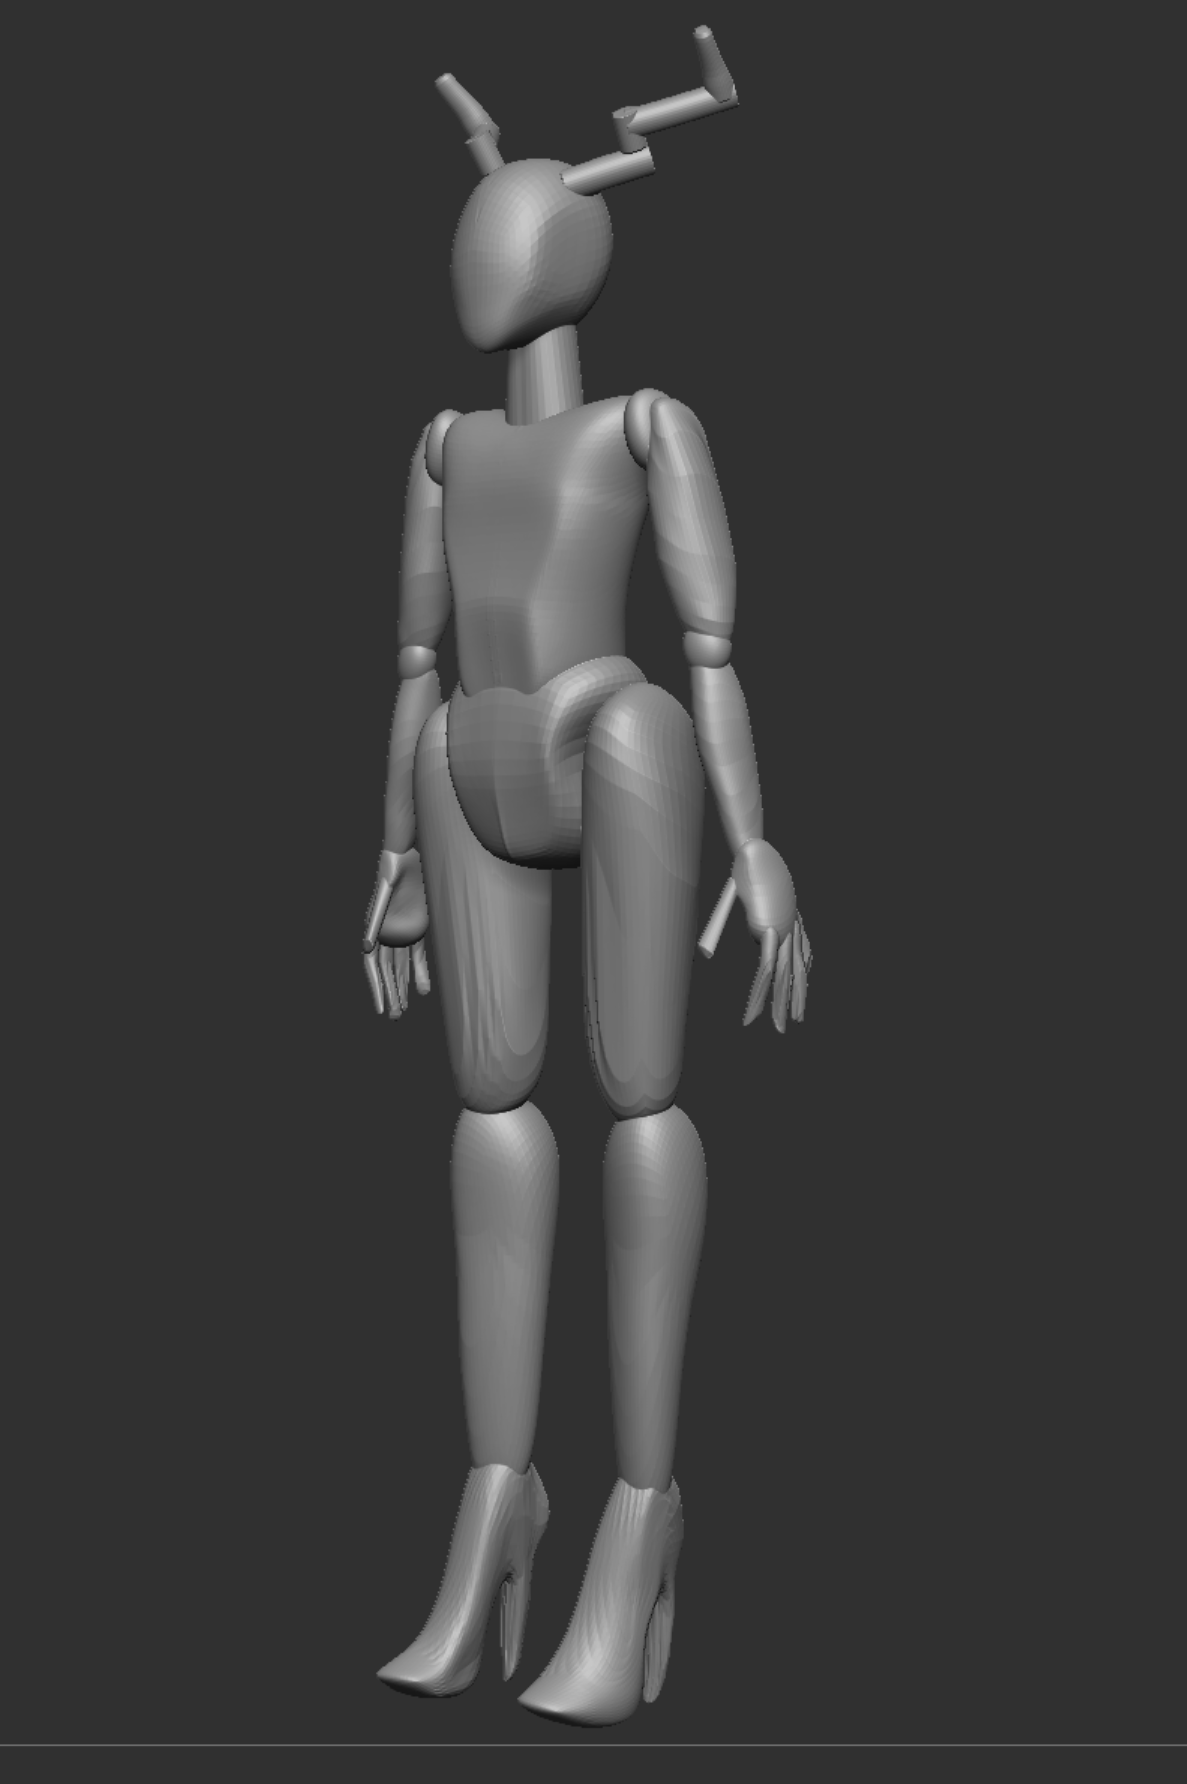
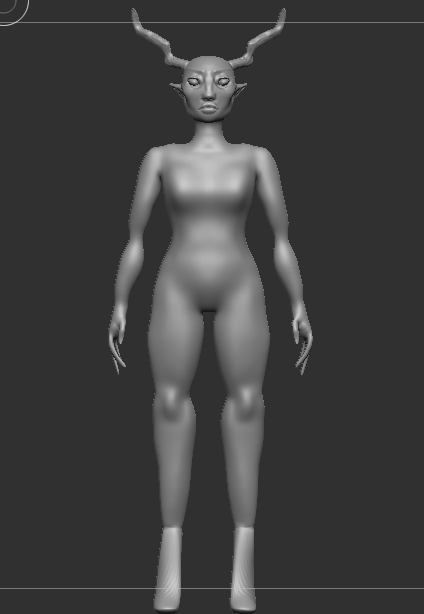
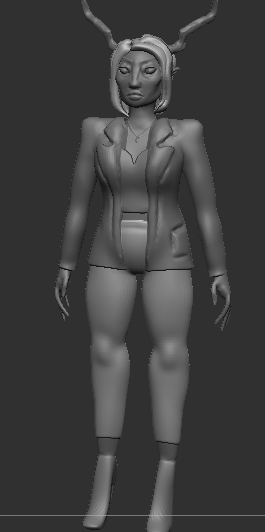
After we were happy with the way our anatomy looked, we Zremeshed our model and divided it’s subdivisions so that we could work on the anatomy as a whole model and not a sum of parts. I decided to mould the shoes onto my character as I thought that it would be the easiest way to create the high heel shape. I then used the ‘clay build-up’ brush on a mix of Zadd and Zsub to create the indentations and add the lips on to the face. The hands were created by using the ‘move’ brush to extend clay that was built up on to the hands, I chose to do this because I wanted her fingers to be long and extended, to give her a scary/ethereal look.
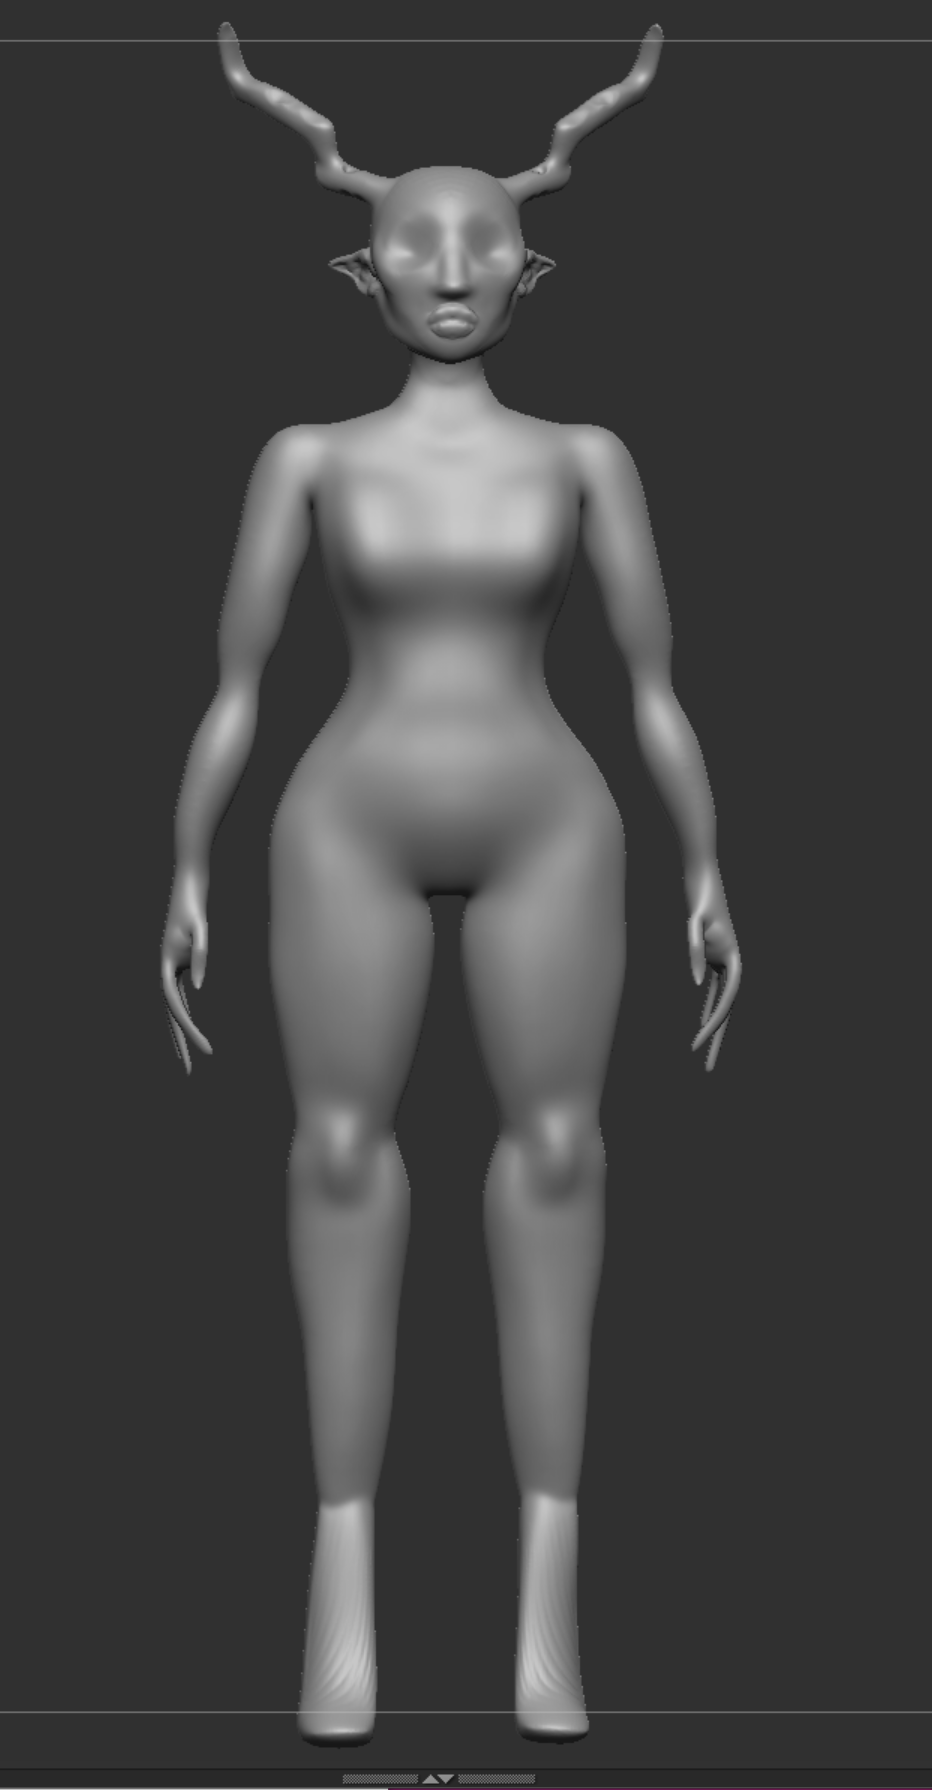
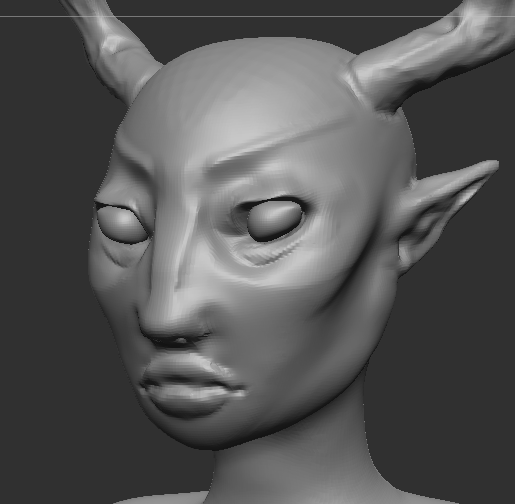
Then a few minor adjustments were made to the body using the move tool and more detail was added into the face. The eyes and eyebrows really made the face for me. I was really impressed with how the face turned out. I used the ‘clay build-up’ brush to create the nose shape and eyes, but went in with the ‘DamStandard’ brush to carve out the fine lines of the mouth, eyebrows and nose.
The hair was quite tricky to get right. It took a while to get hang of the hair brush that I downloaded from the recommended youtube tutorial. But once The hair was in place and all at the correct length, I Zremeshed it and divided the subdivisions then found that I could use the ‘Inflat’ brush and the ‘clay build-up’ to fill in the bald spots that the hair brush had left. After I had done that, I found that the hair looked a lot better than I initially expected.

I did the clothes by masking off sections of the body and extracting them. By experimenting with the thickness of my extractions, I could easily figure out how everything would come together. After I had extracted the clothes that I wanted, I Zremeshed everything and could draw over the top of it using the ‘clay build-up’ brush and the ‘DamStandard’. This is how I managed to make her blazer with the pocket and the waistline on the trousers.
Overall the process of modelling my character was a lot of fun and I am very proud with how I captured her design and put it into 3D. The process came with a lot of struggles, but I managed to overcome most of them and I think her design appears to be very similar to her original concept sketches.