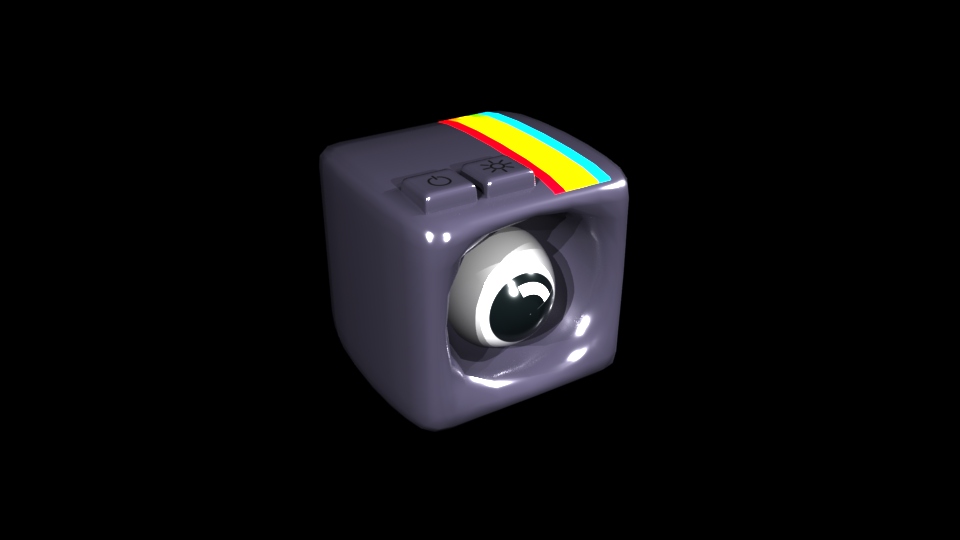
To illuminate my assets I used the directional light option and added multiple lights to my scene. I increased the intensity as needed in order for the rendered asset to turn out well.

When the directional light is added into my scene I press ‘6’ in order to show the lighting and how it effects my asset.
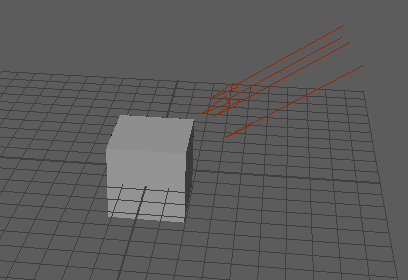
Doing this creates these red arrows around my asset which shows the direction of the light. After I was happy with the light added, I rendered my image by selecting this option in the top right of the interface:

This then creates a rendered image of my asset in another tab like this: